Getting Started: Student
Welcome to Tutor IDE! This guide will help you start your programming adventure — step by step.
1. Log in
Your teacher will give you a username and password — enter them on the app.tutoride.dev page and click "Log in".
If you don't have a teacher, you can also create an account yourself — click "Sign up" and fill out the form.
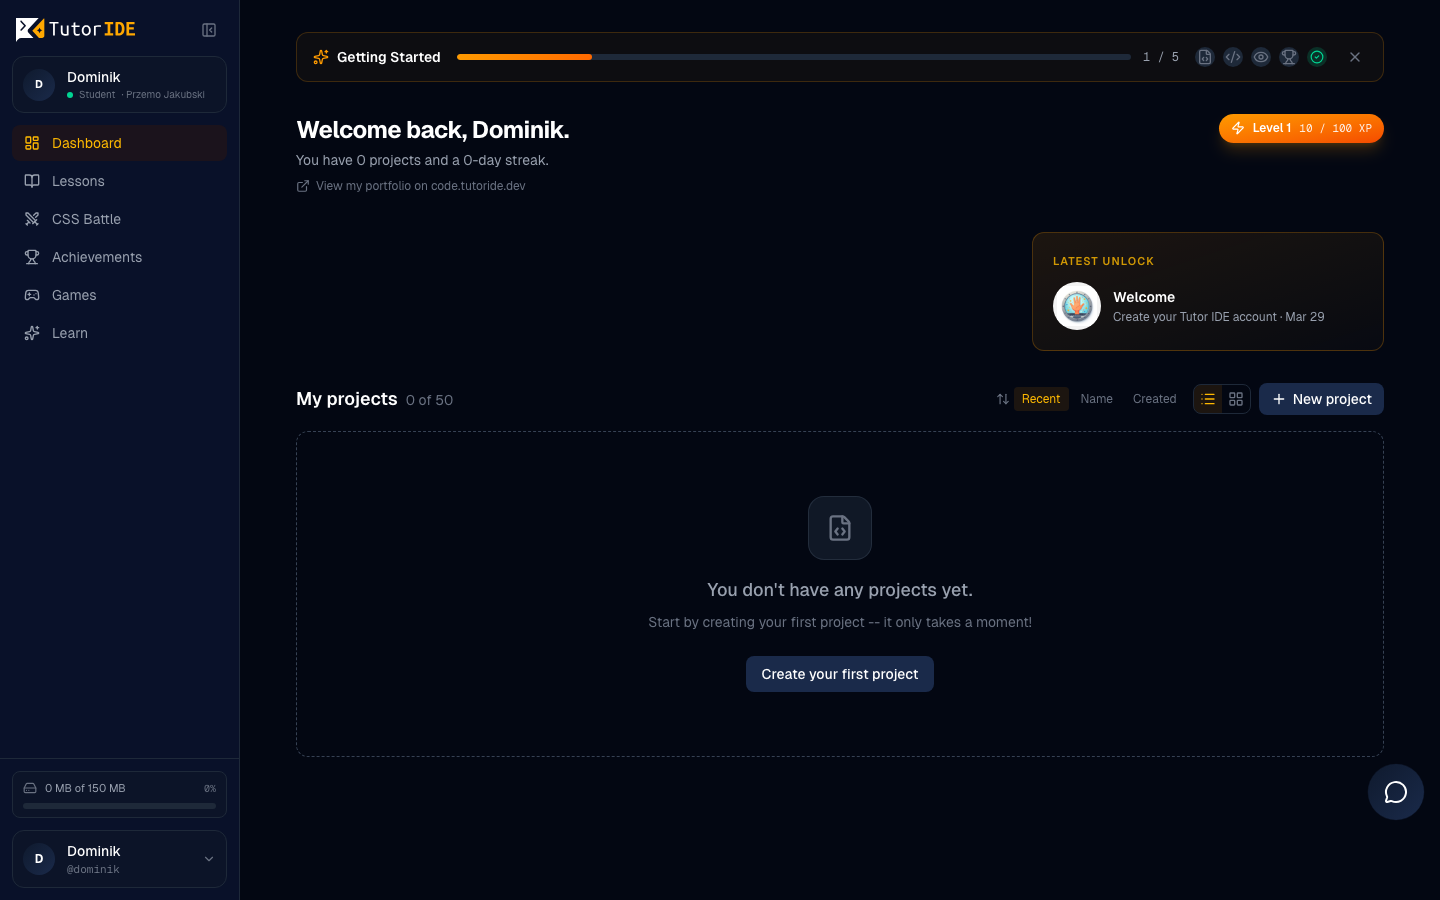
2. Onboarding checklist
When you log in for the first time, you'll see an onboarding checklist — a set of simple steps to help you get to know the platform. Each step is a short task, like "Create your first project" or "Solve your first challenge". Complete them one by one — it's the fastest way to feel confident on the platform.
3. Join an organization
If your teacher gave you an invitation code, click "Join an organization" and enter the code. You will be automatically added to the appropriate group.
If the teacher created your account, everything is already set up — after logging in, you're already in the group.
4. Create your first project
On the dashboard, click "New Project" and choose a template:
- HTML/CSS — building web pages with colors, fonts, and layout
- HTML/CSS/JS — same as above, but with interactive elements (animations, buttons, games!)
- Python — programming in Python (calculations, text games, algorithms)
Give your project a name and click "Create". The code editor will open — this is where the fun begins!
5. Write code and see the result
On the left side, you'll see the code editor — this is where you write HTML, CSS, or JavaScript. On the right side is the preview — your page displayed live.
Every change you save (Ctrl+S) will instantly appear in the preview. Experiment! Change a color, add a new heading, insert an image — and watch what happens.
6. Ask the AI assistant for help
Don't know how to do something? Click the chat icon and ask a question to the AI assistant. For example, you can ask:
- "How do I change the background color to blue?"
- "What is
<div>?" - "How do I center text on my page?"
The assistant will respond in simple language and help you understand new things.
7. Solve challenges
In the "Challenges" tab, you'll find tasks assigned by your teacher. Each challenge is a new skill to master.
You also have access to CSS Battle — special challenges where you recreate an image using HTML and CSS code. The more precise you are, the higher your score!
8. Play mini-games
Go to the Learn page to find educational mini-games. Each game has three difficulty levels:
- Easy — available right away, perfect for getting started
- Medium — unlocked after earning at least 1 star on Easy
- Hard — unlocked after earning at least 1 star on Medium
Star rating system
For each game, you can earn 0 to 3 stars:
- 0 stars — score below the passing threshold — try again!
- 1 star — passed! You can unlock the next difficulty level
- 2 stars — great score!
- 3 stars — perfect! You're a master of this game
Playing mini-games gives you XP points, so it's a great way to learn and level up at the same time.
9. Follow learning paths
Learning Paths are a structured curriculum that guides you through topics in order — from HTML basics, through CSS, all the way to advanced JavaScript.
Each stage ends with a gate challenge — you need to complete it to move on to the next stage. This way, you can be sure you truly understand each topic before moving forward.
10. Complete daily quests
Every day, daily quests are waiting for you — short goals to complete, such as:
- "Create a new project"
- "Solve a challenge"
- "Play a mini-game"
- "Ask the AI assistant a question"
Completing quests helps you learn consistently and rewards you with extra XP points. Check your daily goals on the dashboard!
11. Publish your project
When your project is ready, click "Publish" in the editor. Your page will appear on the internet at a real address, e.g.:
https://code.tutoride.dev/your-username/my-page/
You can send this link to family, friends, or show it in class.
12. Invite your parents
Your parents can track your progress! On the dashboard, you'll find an option to generate a parent link. Just send it to your mom or dad — when they click it, they'll see your activity, earned achievements, and learning progress. Parents don't need their own account — the link is enough.
13. Earn achievements and badges
There are 44 achievements across 10 categories waiting for you on the platform — each with a unique badge featuring its own custom image. You earn achievements for various activities:
- First steps — e.g., "First Project", "First Publication"
- Challenges — e.g., "CSS Master", "10 Challenges Completed"
- Mini-games — e.g., "Gamer", "Star Collector"
- Activity streaks — e.g., "7 Days in a Row", "30-Day Streak"
- Community — e.g., "Helpful Friend", "Weekly Leader"
- ...and many more!
Check your badge collection on the Achievements page in the dashboard. How many can you collect?
14. Check your progress
On the dashboard, you'll find information about your progress:
- XP points — you earn them for every activity on the platform
- Level — the more XP, the higher your level
- Achievements — 44 unique badges for various accomplishments
- Stars — collected in mini-games for high scores
- Streak — how many days in a row you've been active
15. Check who's in the lead!
Open the leaderboard to see the student ranking in your group. Who earned the most XP this week? Maybe it's you!
Good luck! Programming is a superpower — and you're just starting to discover it. Create, experiment, play mini-games, collect stars, and don't be afraid to ask for help.